Elegoo Neptune 4 3D Printer
Elegoo recently reached out to us to see if we wanted a Neptune 4 3D Printer. Although we already have a few printers at the lab, we don't currently have an Elegoo printer. Besides, the more printers the better right? Naturally we said yes!
The Setup
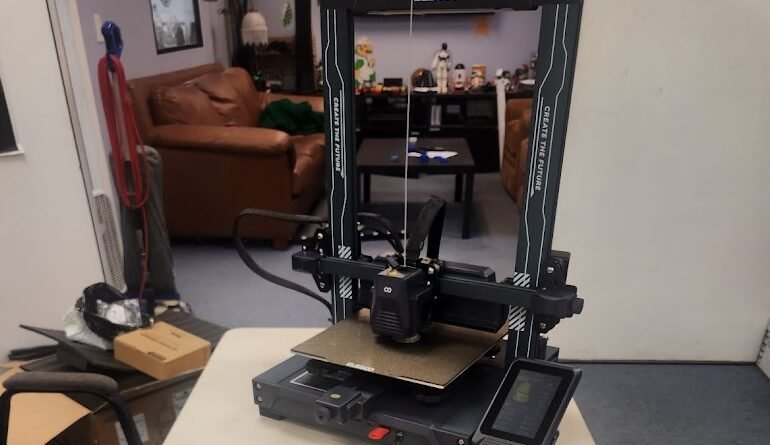
We received the printer and a roll of filament then proceeded to get the printer set up at the lab. The setup process was amazingly easy. The documentation is super easy to follow and there were very little steps to get it built. Granted, I started 3D Printing with Anet A8 clones that came in a box of what felt like 1,000 pieces. But regardless, this build was very easy! The build surface is completely assembled and so is the gantry. You simply connect the gantry to the base, attach the filament sensor (yes it comes with a filament run out sensor!), attach the spool holder, and plug in all the connectors.

Bed Leveling
The bed leveling can't be easier. After a quick manual bed leveling in all 4 corners, we ran the auto leveling (yes, it also comes with bed leveling!). The leveling system is 11x11 so it gives you 121 points of reference. While this may seem like overkill, it doesn't take that long to run and is WELL worth it in the end.
Printing
We decided to run one of the provided gcode files for the Buddha and it turned out awesome! The print only took about 32 minutes to complete. While this isn't the fastest printer available, it is far faster than many others including our current Ender 3v2 and Ender 3 clone. I have sliced other files to compare between my Ender 3v2 profile and my Neptune 4 profile. The speed difference is extremely significant. Models that would take 12+ hours on the Ender only take about 4 hours on the Neptune 4.
Because it is direct drive, you're able to print some specialty filaments like ABS, TPU, and Nylon. We haven't tried any of those yet at the lab but I fully intend to do so soon. I will be reporting back on that either here or on our social media pages, so keep an eye out for that!

Software and Profile
To be perfectly honest, we didn't bother with the provided Cura version and print profile. The version provided is extremely old so even exporting the profile and importing into the new versions would cause issues. Because of how new the printer is, Cura does not have a built in machine profile and searching around online didn't yield many results. So we decided to make our own and share it (see links below).

Network Connection
The Neptune 4 doesn't have a built in Wifi adapter (Plus and Max versions do) but it does have a built in Network card. Which means you can connect it to your network with a wired connection. We chose this option for the Lab because it allows us to send files directly to the machine over the network. This eliminates the need for swapping the SD card over and over again. It's also extremely simple to set up. All you have to do is plug in the network cable and check the machine info menu for the IP address. After you have the IP address plug it into the address bar of any browser on your computer. Once there, you will be able to control the printer and send it your sliced gcode files to print. I feel like this is one of the coolest features for 3D Printers lately. Sure, I have set up Octopi and connected it to a few machines but first of all, good luck finding a Pi at the moment. Secondly, if something happens to the Pi while it is running a print, it kills the whole thing. Having it built all in one is much better.
Final Thoughts
Overall this is an excellent printer and an amazing addition to our Makerspace! Keep checking back as we will be printing some pretty cool stuff with this printer and making post on our Blog and Social Media pages to show off all of what this printer can do.
Printer Profiles and Settings - FamiLAB's Neptune 4 Profiles
Again, a HUGE Thank You to Elegoo for supporting our Makersapace!